
Notification Profiles
Notification profile is a combination of settings and parameters which are used during the monitoring process. Within a notification profile, you need to select triggers which should be registered in media streams. You can apply several profiles of the same type (except for the Alarm profile and Thresholds profile) to a task. The Alarm profile is automatically assigned to a task when the project is created. Other notification types are optional and created by the user if necessary. All required parameters are configured in the notification profile settings.
Configuration of the notification profile is performed in accordance with the following steps:
Working With Profiles
Creating Profile
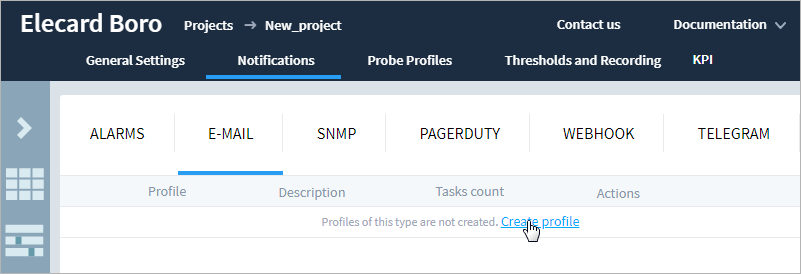
To create a new notification profile, go to the Project Settings ➝ Notifications ➝ and select a type of profile to add. When the profile is created for the first time, click the Create profile button located in the centre of a page. The page will refresh and then you need to set required parameters and select triggers.
When creating all subsequent profiles, this button is located below the list of existing profiles. To rename the created profile, click the  button.
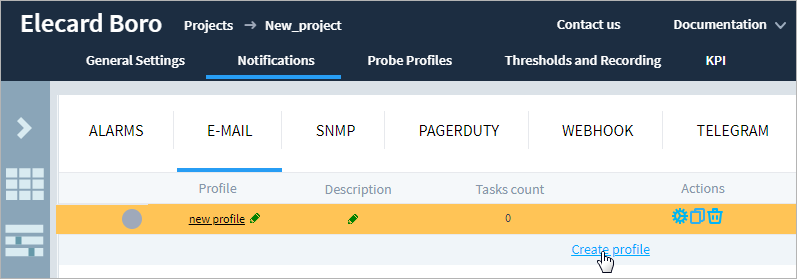
You can manage the profile using following actions:
— copy the profile;
— delete the profile.
Deleting the Profile
To delete a profile, click the button. This button is unavailable if one of the following conditions is satisfied:
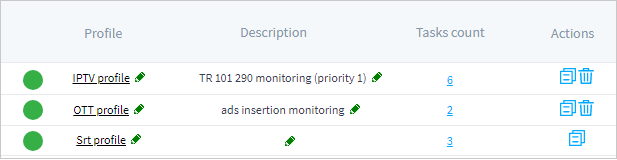
One or several tasks use this profile. You may check whether the profile is assigned to a task in the Tasks count column. If there are tasks using this profile, the actual number will be displayed. Otherwise, 0 is displayed.
Solution
Disable the profile for a task. In the Tasks count column, there is a number of tasks represented as a link. Click the link and select the probe name in the opened window. On the probe page, select all tasks using this profile and click the Configure button. Use the select profiles action and uncheck the required profile. If the profile is used in tasks of several probes, repeat these actions for each probe.
You are trying to delete system profile. This group includes the Alarm profile and the system probe profile (default). These profiles are created by default when the project is created and are assigned to all tasks. These profiles cannot be deleted.
Profile Configuration
For each profile, you need to configure both settings unique to each separate notification profile and basic settings similar to all notification profiles.
Configuration of unique settings is described within guides for notification profiles:
For the rest profile configuration, there are settings defining notification sending intervals, timezone and desired language. These settings are not available for the Alarms profile.
Profile Description
At each stage, you can add a profile description such as a monitoring type, a probe group, or other important information.
The profile description will be displayed when the mouse cursor hovers over the profile name in the profile selection window.
Silence Period
The silence period setting allows to freeze sending of notifications for a set period without disabling the notification profile.

Disable notifications — the setting specifies the period during which the server will not notify about task events. When the period ends, registered events will be sent in accordance with the option chosen for the After the silence period setting:
all accumulated events — send notifications about all events and states that are registered during the silence period;
only active states — send notifications about states that remain active when the silence period ends.
Timezone and Language
By default, the timezone correlates with the zone of the system, which means that the time data in notifications will not be transformed to any time zone. You may select a time zone which will be used for indication of event occurrence time in notifications.
To change a timezone, go to the notification profile page. Select the preferred timezone and save changes.
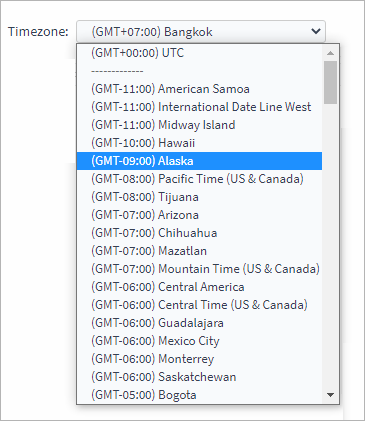
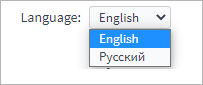
You may change the language of notifications in the same way. Select the preferred language (Russian or English) and save changes. This setting is not available for Alarms and SNMP profiles.
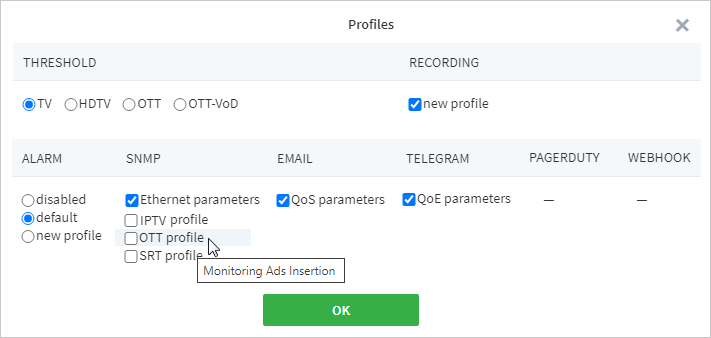
Selecting Triggers
As you finish configuring the profile, select required triggers that should initiate notification sending. Each profile contains the same set of triggers. Below is a fragment of the triggers set. To learn more about the full list of triggers, go to the Triggers chapter.
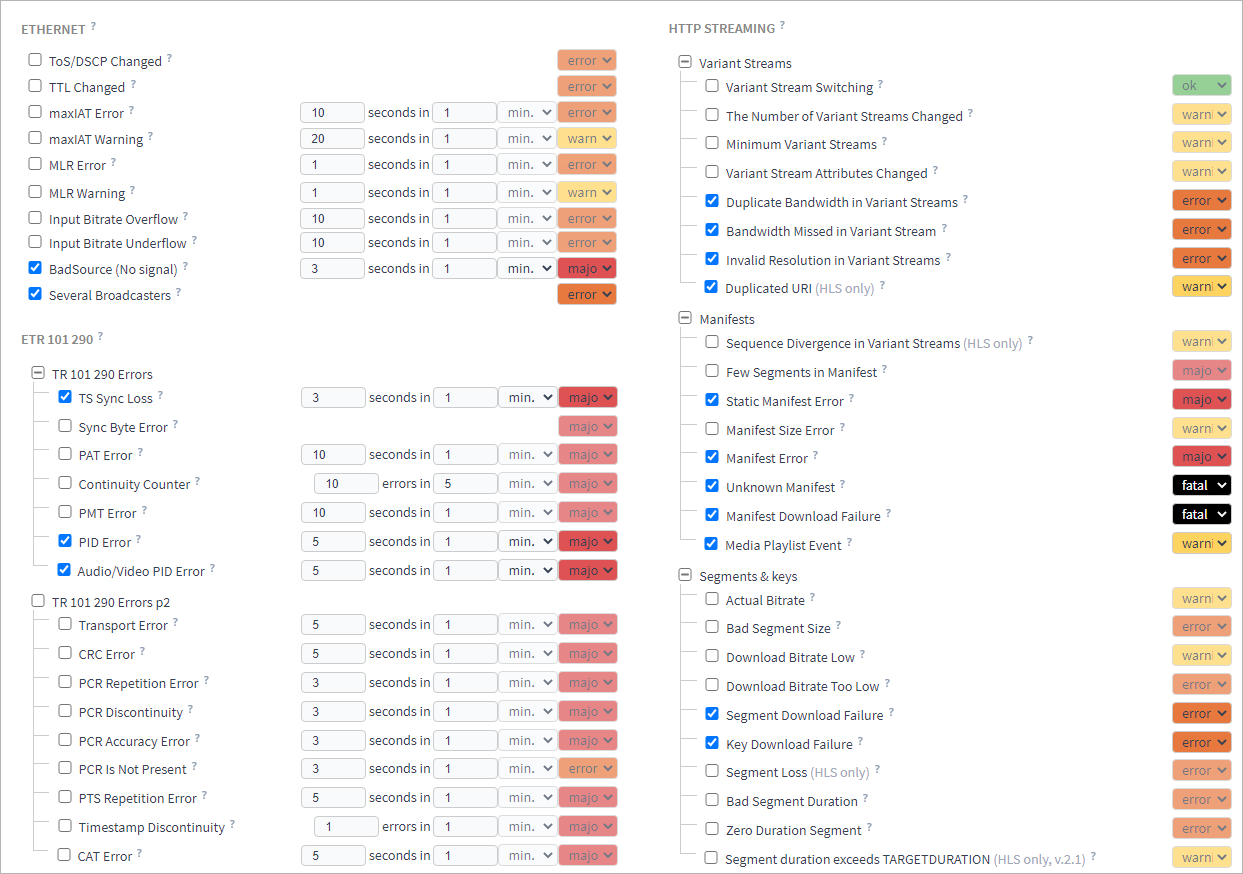
There are three types of triggers depending on their settings method and functions:
Triggers where each event generates triggering. Only level can be configured.

Triggers integrating event duration within the stated period. The event total duration, period and level can be configured.

Triggers integrating the number of events within the stated period. The total number of events, period and level can be configured.

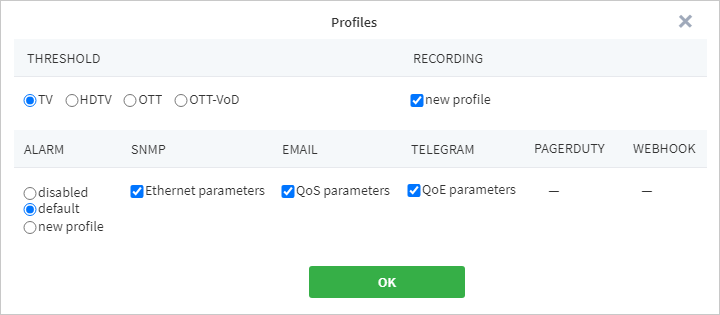
Activate required triggers and specify, if necessary, your own values. Click Save button.
Assigning Profiles
Assigning a Profile Automatically
In the project settings, you can select for which task type the profile should be used. Thus, when setting an analysis task it will be assigned with a default profile depending on the protocol type (IPTV, OTT, SRT).
The setting is blocked (closed lock) by default that prevents making accidental changes while working with the page. To start assigning profiles, unblock the settings by clicking the lock sign. For adding a new rule, select a task type in the Default profile column for which a profile should be used.

Block the setting after changes are made. If necessary, you can assign to a task a profile other than the default when starting a task.
Note
For the running tasks, automatic profile changing won’t take effect. If needed, switch a current profile of a running task to a required one manually.
Assigning a Profile Manually
To assign the profile, go to the probe page, select one or several tasks from the list and click the Configure button. In the Configuration window, click the select profiles button.
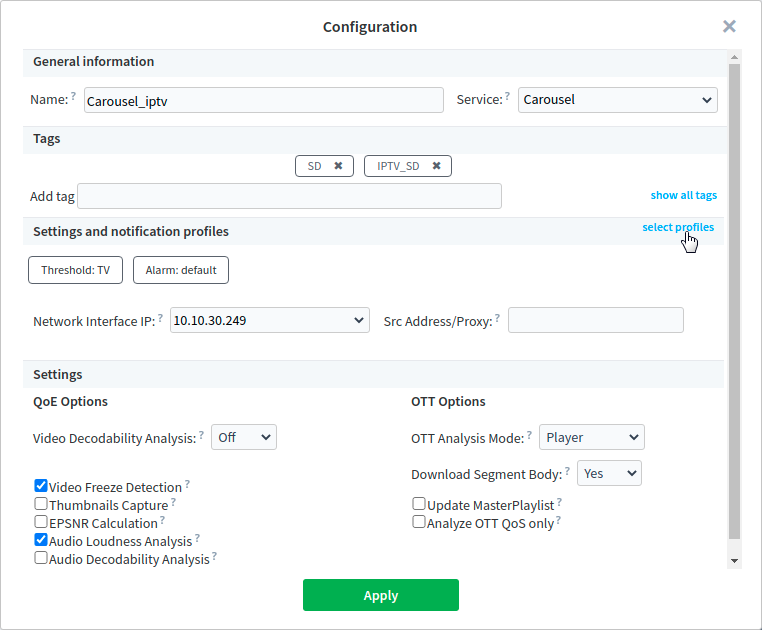
In the run window, check the profile box and click the OK button.
As the window closes, click the Apply button.
To define whether the profile is active, go to a profile page and check the indicator. The following states are possible:
Green — a profile is active, contains recipients of notifications;
Red — no notification recipient is assigned for a profile. Profile triggers will not be registered;
Grey — a profile is disabled.
