Webhook + Slack
Webhook
Webhook allows receiving HTTP notifications to the set address in a real-time mode. When a trigger fires, the Boro server sends the HTTP POST request in the JSON format to the specified user IP address.
Creating and Applying the Profile
To add a new profile, open the project settings page, go to the Notifications➝Webhook, and click the Create profile.
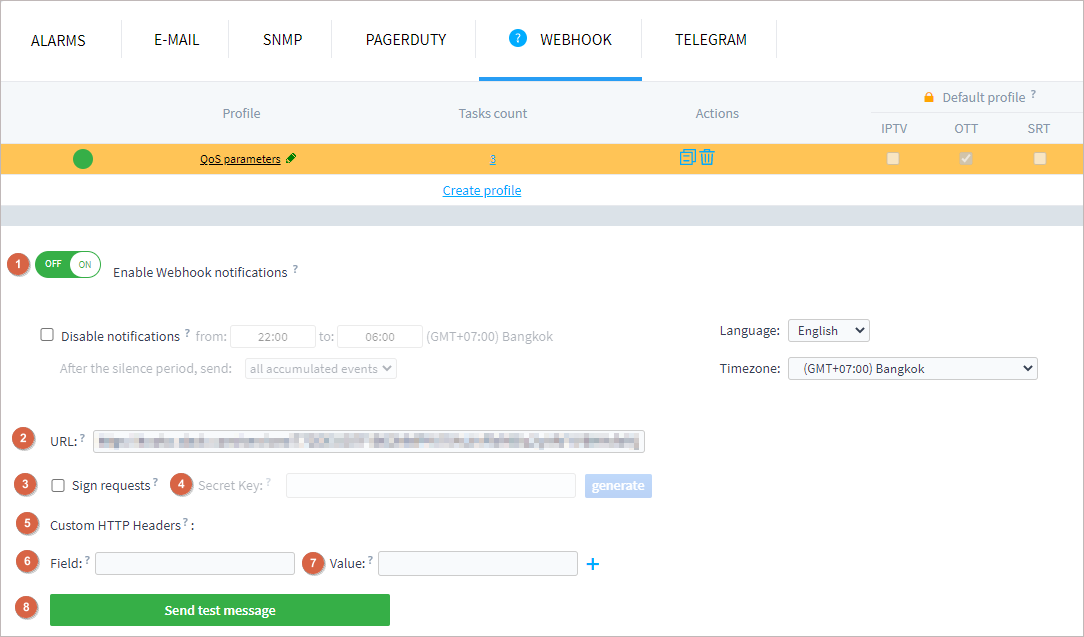
To enable a profile, check that the setting Enable Webhook notifications (1) is active.
Configuring Webhook
In the URL (2) field, specify an URL or IP address of the server to which Webhook notifications should be sent. Additionally, the following notification settings may be used:
- Sign requests (3) — the setting allows including the Authorization field in the HTTP header: APIAuth-HMAC-SHA256 <profile id>:<signature>, where:
<profile id> — Webhook notification profile ID on the Boro server;
<signature> — calculated as the result of HMAC-SHA-256(“<HTTP Method>,<Content-Type>,<Content-Sha256>,<Request-URI>,<Date>”,”mysecretkey”).
Secret Key (4) — key in the hexadecimal format used for HMAC codes generation. Generate the secret key and save it in a secure place. The key is required to organize the signature check on the receiving side;
- Custom HTTP Headers (5) — the setting allows adding some custom fields and their values to the header of HTTP request. The standard header fields such as
Content-TypeandUser-Agentcan also be redefined with custom values; Field (6) — specifies the field name of the header in HTTP request.
Value (7) — specifies the field value of the header in HTTP request.
- Custom HTTP Headers (5) — the setting allows adding some custom fields and their values to the header of HTTP request. The standard header fields such as
To validate the correctness of specified settings, click the Send test message (8) button. If the message has been received, save the profile.
Notification Format
Each triggered action provokes sending a new notification message (the messages are not combined in the same request). The messages are sent as HTTP POST request in the JSON format and contain the following fields:
version — protocol version;
sequenceId — identification number of a message;
referenceNumber — (optional field) reference number of a message used to connect messages referring to the error state occurrence and its completion;
project_name — name of the project to which the received message refers;
probe_name — name of the probe that registered an event;
task_uri — URI of the service or stream for which an event was registered;
task_name — name of the task for which an event was registered;
subtask_uri — (optional field) applies to HLS, SRT, DASH. Depending on a stream type, transmits a media representation URI (a variant stream for HLSv3, an SRT stream URI) for which an alarm was registered;
subtask_description — (optional field) applies to HLS, SRT, DASH protocols. Transmits the description of a media representation (a variant stream for HLSv3) or an SRT stream description;
trigger — name of the trigger (in the selected language);
status — status of an error state Active|Cleared or Event if the trigger relates to the “Event” type;
level — specifies an event severity level (set in notification profile);
time — time of the “Event” trigger or state occurrence time;
time_end — (optional field) time of state completion;
duration — (optional field) the time during which state has been active;
profile_name — name of the notification profile for which an event has been registered;
- links — (optional field) an array of links in the Boro system:
- type — defines a type of an object for which the link is provided. The following values are possible:
task — (optional field) link to a parent task (Manifest for OTT, Master for SRT) in the Boro system;
subtask — (optional field) link to a task analyzing a media representation (OTT) or a stream (SRT) in the Boro system;
profile — (optional field) link to a page of Webhook profile assigned to a task.
href — links.
pid — (optional field) information about the PID triggered the event;
count_by_pids — (optional field) an array, distribution of errors for each PID, only for CC errors;
count — (optional field) number of errors, only for triggers related to the “Event” type;
- details — (optional field) an object, contains additional information about an error:
curl_error — (optional field) an object, contains description and error codes that libcurl returns when connecting to the HTTP server;
http_error — (optional field) an object, contains HTTP error codes that can occur when downloading objects (playlists, keys, segments) for the HLS and DASH protocols;
source_ip — (optional field) a final IP address (after resolving DNS and all redirections) when downloading HTTP objects, for the HLS and DASH protocols.
 {
   "version":"1.1",
   "sequenceId":666,
   "referenceNumber":7189705,
   "project_name":"Elecard Network",
   "probe_name":"Development probe",
   "task_uri":"http://10.10.30.53:8080/DASH/DASH.mpd",
   "task_name":"DASH AllRenditions",
   "subtask_uri":"http://10.10.30.53:8080/Match/HQ_video",
   "subtask_description":"video(HQ_video 4 Mb/s: 1280x720, avc1.4D001F)",
   "trigger":"Timestamp Discontinuity",
   "status":"Cleared",
   "level":"major",
   "time":"2022-04-13T16:16:38.849+07:00",
   "time_end":"2022-04-13T16:16:39.743+07:00",
   "duration":"1 s",
   "count":3,
   "count_by_pids":{
     "1001":3
   },
   "profile_name":"new profile",
   "links":[
     {
       "type":"task",
       "href":"http://172.16.11.111/projects/23/apps/1105/tasks/330566"
     },
     {
       "type":"subtask",
       "href":"http://172.16.11.111/projects/23/apps/1105/tasks/330569"
     },
     {
       "type":"profile",
       "href":"http://172.16.11.111/projects/23/profiles?notif_id=265"
     }
   ]
 }
Configuring Notification Sending to Slack
Notifications can be sent to Slack using Webhook profile. This is achieved due to the Incoming Webhooks app which should be added to your workspace in Slack as described below.
Adding Slack configuration
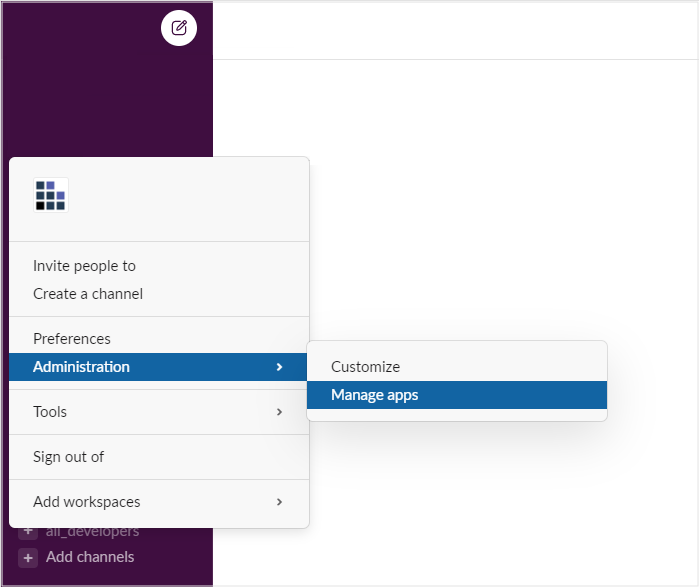
In Slack dashboard go to: Administration➝Manage apps. The Apps web page will open.
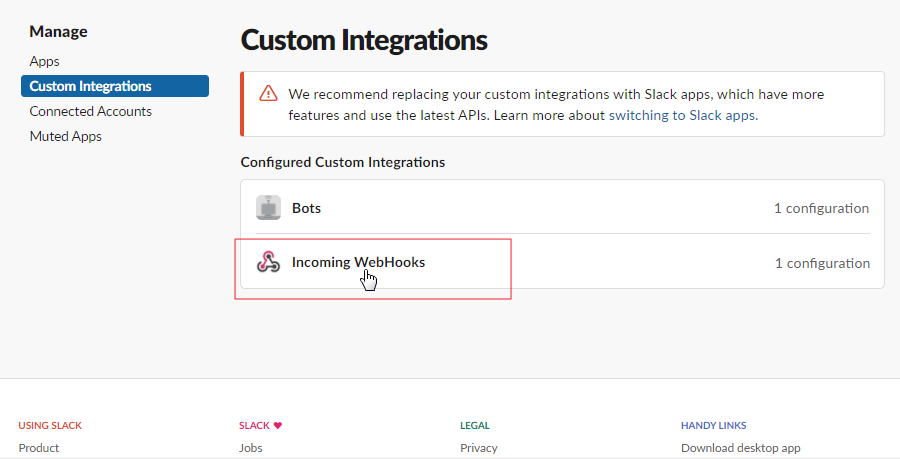
In the Manage menu, select Custom Integrations. Via the Configured Custom Integrations list or using the search box, find the Incoming WebHooks app and go to its page.
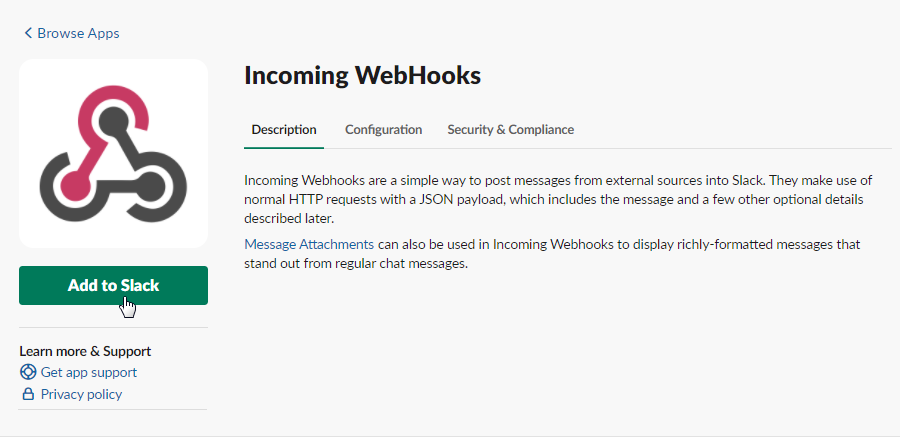
To add the configuration, click the Add to Slack button.
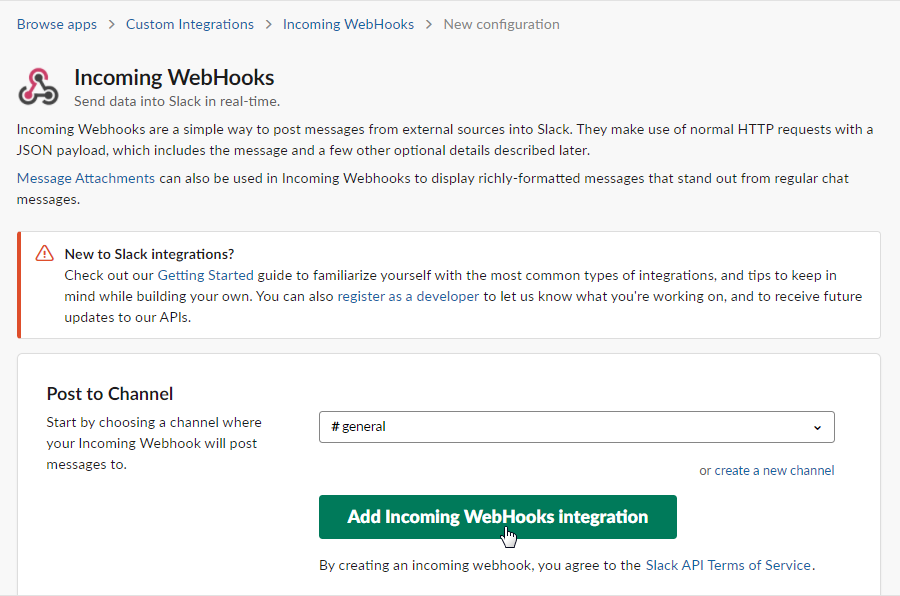
Next, choose a channel to post notifications and click the Add Incoming WebHooks Integration button.
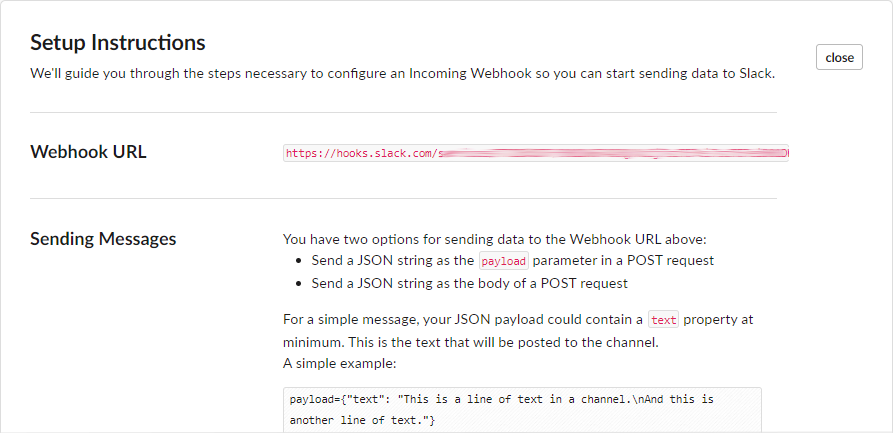
You’ll be sent back to your app settings, and you should now see a new entry which is the Webhook URL. Copy the address, go the Boro web interface and paste it to the URL field in the Webhook profile page. Save changes.
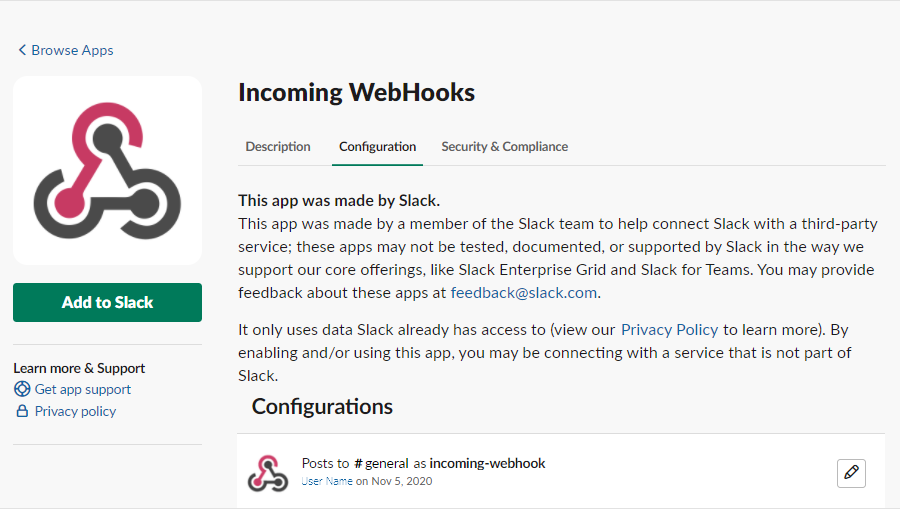
To change a previously created Slack configuration, go to the Incoming Webhooks page. The Configuration tab displays a list of all configurations, select the desired configuration, and click the ![]() icon. You can make the following changes on the configuration page:
icon. You can make the following changes on the configuration page:
Changing the channel to post Webhook notifications;
Generating a new Webhook URL;
Disabling or Removing the Configuration.
Notification Sending
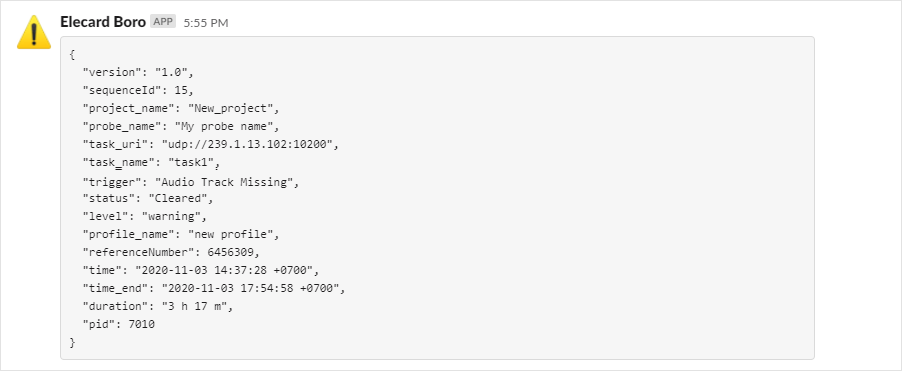
All notifications are JSON data represented as key-value pairs. The list of fields is described in the Notification Format chapter. Below is an example of a notification which is sent when an event trigger fires once the configuration is completed.
