
4.6. SAML Authentication
The SAML Single Sign-On (SSO) technology allows users to access several applications using the same set of credentials. To do this, a SAML identity provider authenticates users and passes credentials for authorization to a Boro application.
Attention
Currently, Boro supports only the HTTP-POST binding method, when the whole set of credentials is passed within the request body as an XML document.
To implement sign-on with SAML, you need to exchange metadata between the provider and the Boro application. It is required so that the provider could unambiguously identify the application and pass data for user authorization securely. This guide uses Amazon Web Services (AWS) as an example of an identity provider.
Getting Metadata From AWS
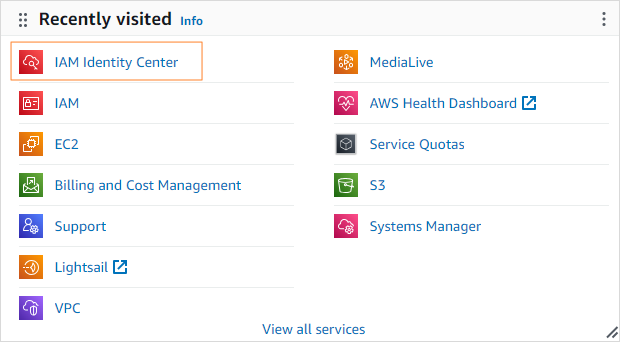
Go to the AWS website and click Sign In to the Console in the upper right corner.
Access your AWS account.
Open the IAM Identity Center and activate it in your AWS account.
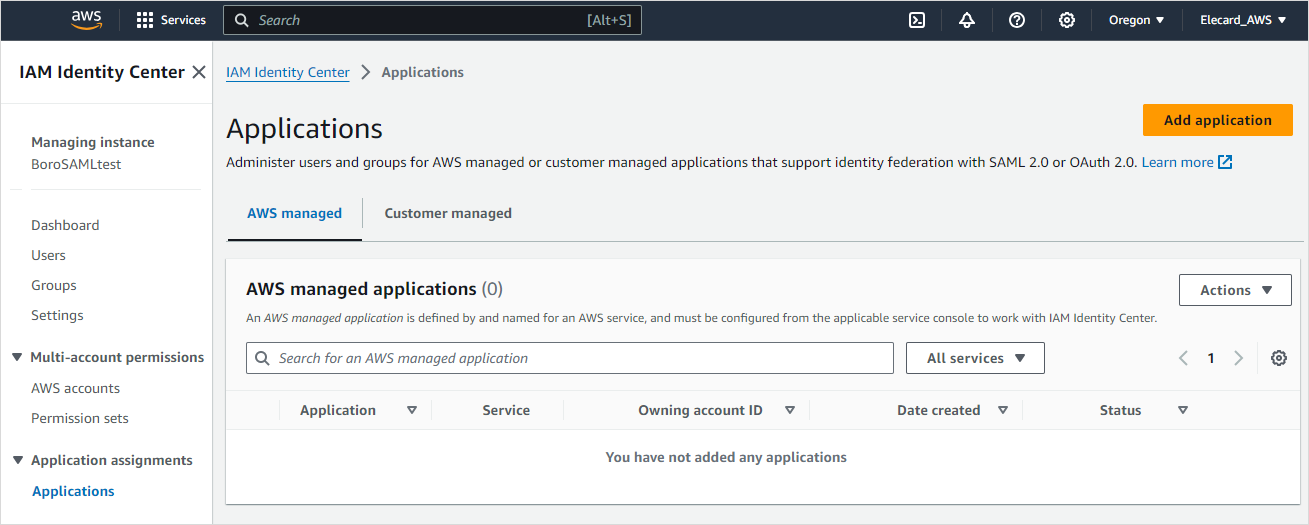
Click the Applications tab on the panel to the left.
Click the Add application button in the upper right corner to add an application for which you want to set up SAML authentication.
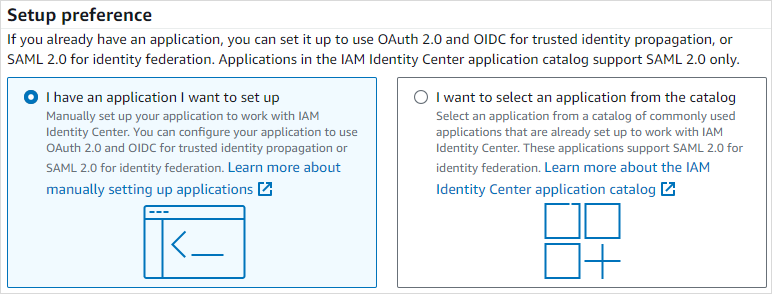
Then choose the I have an application I want to set up option in the Setup preference section.
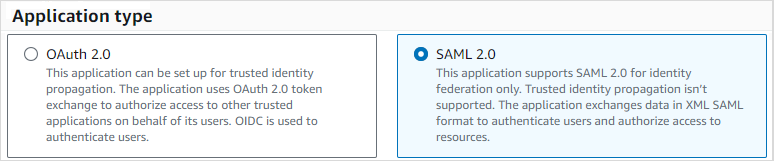
The Application type section will appear below. Select SAML 2.0 and click Next. The Configure application page will open.
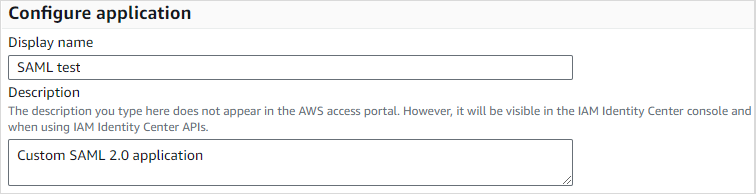
On the Configure application page, type in the application’s name in the Display name field.
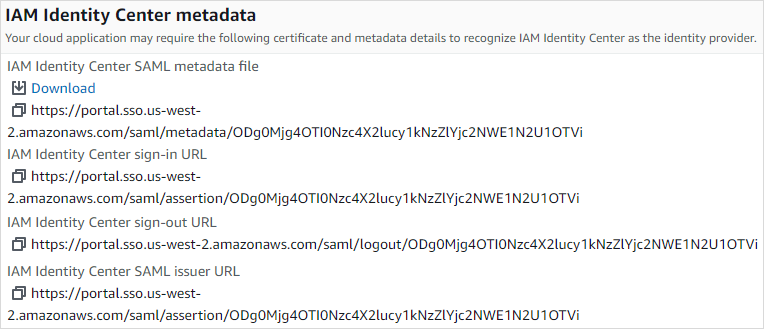
Download the IAM Identity Center SAML metadata file below by clicking the Download link. The file contains the metadata of the identity provider. You will need to copy the file content and paste it into the Boro application.
Note
Leave the default value in the Session duration field. This parameter is related to the AWS portal. To set session duration in Boro, use the Session expires field.
Now you need to set up SAML in Boro before doing the rest of the steps in AWS.
Setting up SAML Authentication in Boro
Sign in to a Boro account using the administrator or owner credentials of the chosen project. Authentication is set up for each project individually.
Go to Project settings → General Settings. Scroll the page down to the SAML section and tick the Enable SAML SSO checkbox.
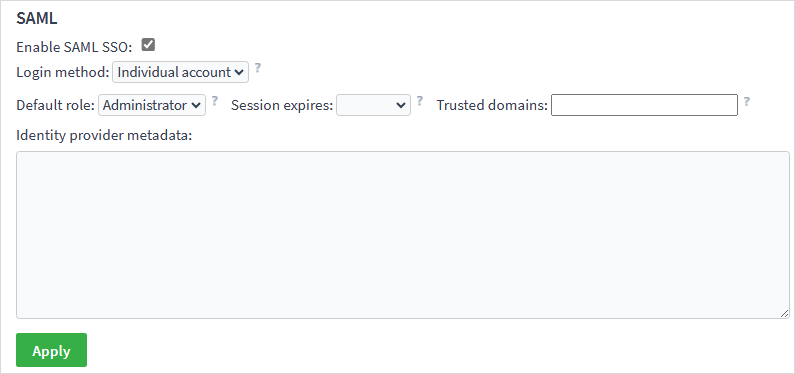
Select the login method:
Individual account — users access the server from their own accounts. If a user with a certain email address is not in the database, they will be registered automatically. The registration requires verifying the email address via a link sent in a letter.
Proxy account — users access the server via a single account that was registered in a regular way (without SAML SSO). The account should be added with the chosen role to the project beforehand. The account owner should allow using it as a single sign-on.
The procedures for configuring an individual account and a proxy account are described below.
Individual account
Specify the role that the user will have in the project when signing on via SAML. The following roles are available: Administrator, Engineer, Operator, Viewer. You can get more details about the roles in the Project Sharing section. If a user with this email address has already been added to the project, the user’s role remains.
If necessary, set the session duration in the Session expires field. To give access only to accounts with certain top-level domains, list these domains separated by commas in the Trusted domains field.
Copy the data from the file you downloaded from AWS and paste it in the Identity provider metadata field. Click Apply.
Proxy account
Select the email address of a proxy account from a drop-down list. The list contains the addresses of users who were previously granted shared access to the project.
Copy the data from the file you downloaded from AWS and paste it in the Identity provider metadata field. Click Apply.
The user with the chosen address will get an email with a request to become a proxy user in the project. The user should open the email and follow the link to their profile.
On the profile page, the user should accept the request to become a proxy user. The request can be rejected in the future. When the user accepts the request, the Accepted status will appear next to the email address in the SAML section.
Next, scroll the page down and download the metadata file of the Boro application by clicking Download. Upload the file in AWS as described below to finalize configuring SAML authentication.
Uploading the Metadata of Boro Application to AWS
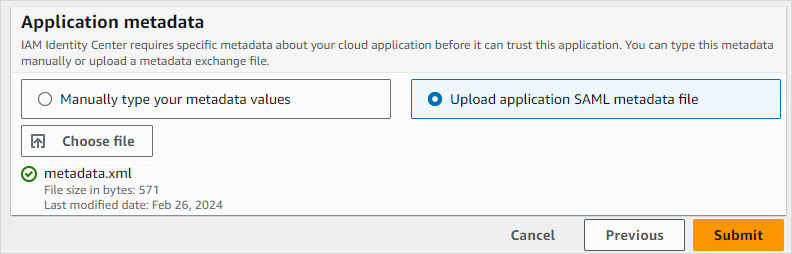
To upload the metadata of your Boro application, return to the Configure application page where you downloaded the metadata of the AWS identity provider. Go to the Application metadata section at the end of the page and select the Upload application SAML metadata file option. Click Choose file and select the file with the Boro application metadata. Click Submit.
On the page of your application, click Actions and select Edit attribute mappings in the drop-down list to set the attributes for authorization.
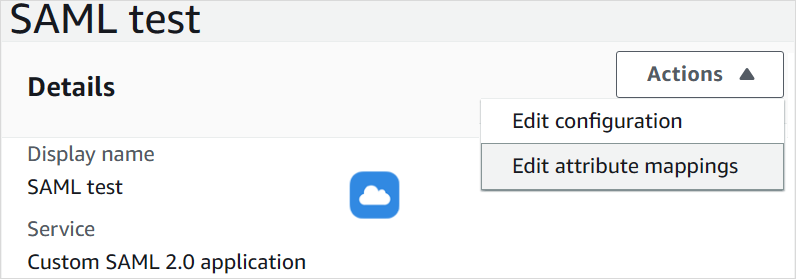
Provide values for attributes. Enter
${user:subject}in the field next to the Subject attribute and select the transient property in the drop-down list to the right.Add a new attribute by clicking Add new attribute mapping. Name the attribute e-mail, type the
${user:email}value next to it, and select the basic property. Click Save changes.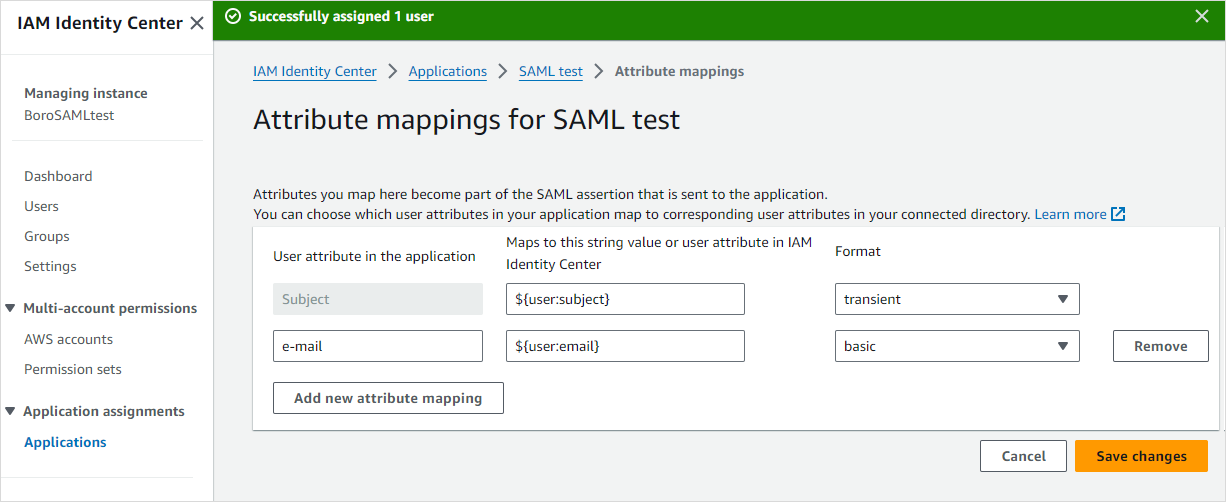
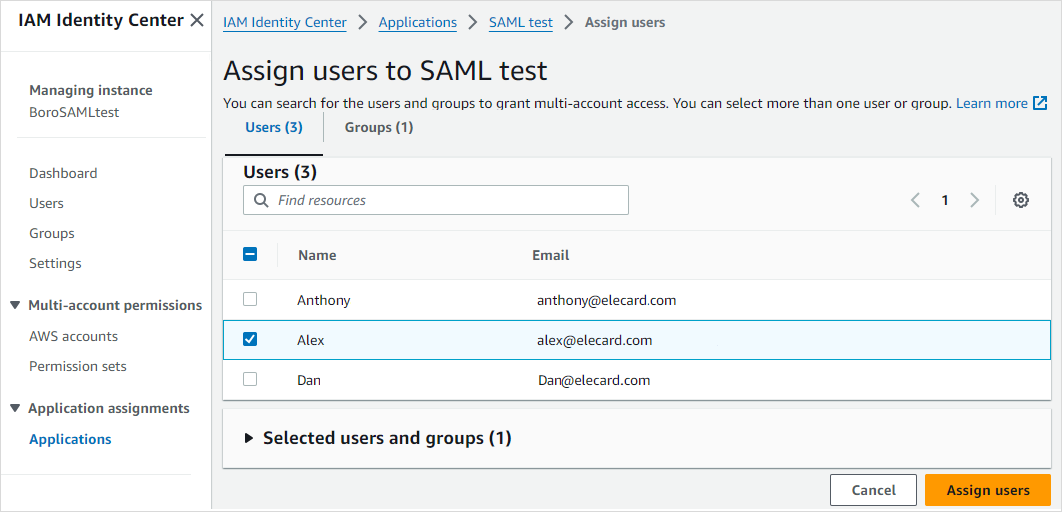
Assign users and(or) groups to the Boro application by clicking Assign users and groups. Tick the checkboxes next to the names of those users you want to add or go to the Groups tab above the list of users and tick the corresponding groups. Click Assign users. If users or groups are not created yet, create them in Users and Groups tabs on the panel to the left.
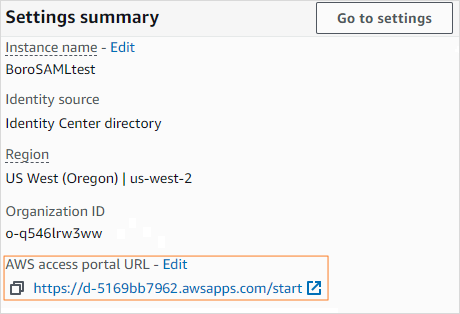
Open the AWS access portal page that contains all applications with SAML authentication. To do this, click the Dashboard tab on the panel to the left and then click the AWS access portal URL link in the Settings summary section to the right.
Note
You need to enable two-factor authentication when entering the AWS access portal for the first time.
Go to the Boro application.
If the Proxy account login method is chosen, users will be authorized in the Boro project under the proxy user’s name.
If the Individual account login method is chosen, Boro will send a registration verification email to the user’s address indicated in AWS when this user attempts to authenticate in Boro for the first time. Open the email, follow the link to verify your registration in Boro, then enter the Boro application from the AWS access portal again.