
2.4. Working with Tagged Traffic
Note
The article doesn’t cover all possible ways to configure VLAN interfaces for all distributives. In case you didn’t find the appropriate way, please consult your distributive’s documentation.
The Object of Tagged Traffic
VLAN stands for Virtual Local Area Network, which connects a group of devices that can communicate directly at the channel level, even though they are connected to different network switches. VLAN offers a wide range of features and capabilities:
Using a single physical channel to transmit multiple networks.
Logical division of the switch into multiple networks that do not communicate with each other.
Flexible grouping of devices.
Reducing the amount of broadcast traffic on the network.
Switch ports that support VLAN networks can be divided into two groups:
Trunk ports
Access ports
Trunk ports are designed to carry traffic for multiple VLANs through a single switch port. As a result, trunk ports can receive data from some VLANs to a specific port. To receive data, the device should have hardware or software VLAN support.
An access port receives the traffic of only one VLAN, but this data does not contain any tags. In other words, the port is used to connect the end device that doesn’t need the presence of the VLAN.
Tagged traffic contains a tag that allows the traffic to be associated with the specific VLAN. Without a tag, the switch cannot define traffic of different VLAN connections. The most popular way of representing tags is described in the open standard IEEE 802.1Q.

How Boro Works With Tagged Traffic
Boro is not capable of working directly with tagged traffic, so you will need to configure the OS network subsystem to receive VLAN data. To do this, create a virtual network adapter to which the probe will then connect to receive data. Select a required interface when starting a task.
Note that the probe can receive data from the trunk port in Sniffing mode without creating a virtual adapter. However, multicast packets should be present on the port when sniffing, as the probe cannot send the IGMP join request.
Configuring VLAN interfaces
Linux support
For the Linux operating system, VLAN support is implemented in most distributives. The most common configuration methods are described below:
Ubuntu 20.04 - nmcli
Configuring VLAN interfaces from the command line.
To create a VLAN connection named “test” based on the physical interface enp2s0 with the VLAN interface name “enp2s0.203” and ID 203, you should run the following command in the terminal:
nmcli con add type vlan con-name test ifname enp2s0.203 dev enp2s0 id 203

nmcli con - creating connection,add type vlan - creating a VLAN connection,con-name - a name for the created interface,ifname - a VLAN interface name,dev enp2s0 - a parent interface name,id 203 - VLAN id
The response should include a connection name:

Check with the ip a command that the created VLAN has received an IP address:

Rocky 8 - nmtui
Configuring VLAN interfaces in Centos 7, Rocky 8, Ubuntu 20.04 Desktop using the nmtui utility.
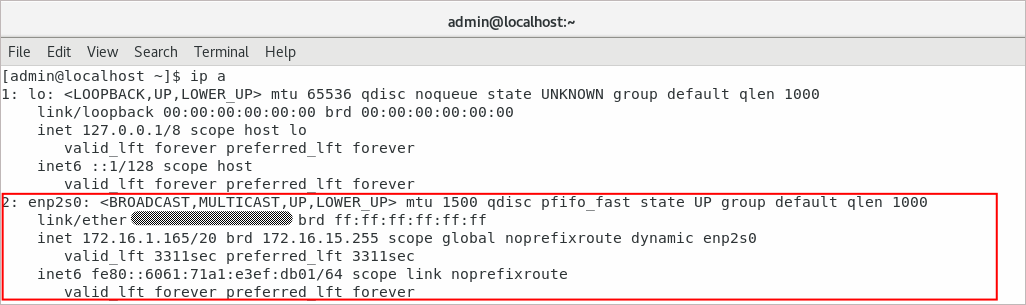
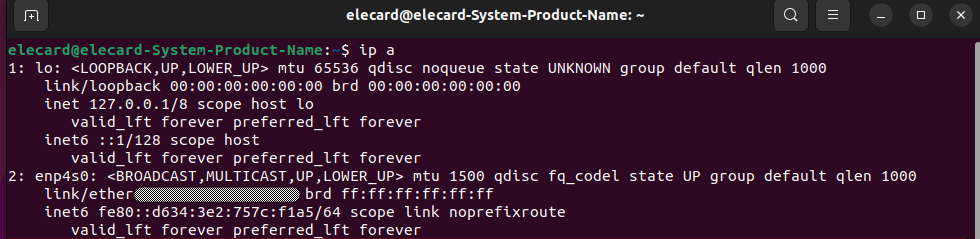
To view the available interfaces on the system, enter the ip a command in a terminal.
The reply will contain the physical interface, e.g. “enp2s0” that will be used to create the VLAN connection:
Further configuration requires superuser privileges.
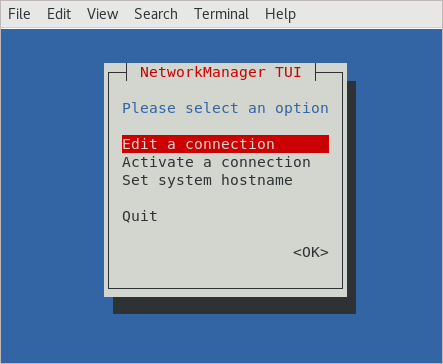
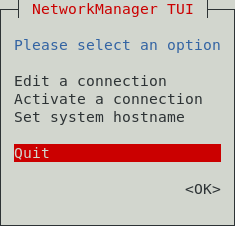
Enter the sudo nmtui command.
In the window that opens, select “Edit a connection“:
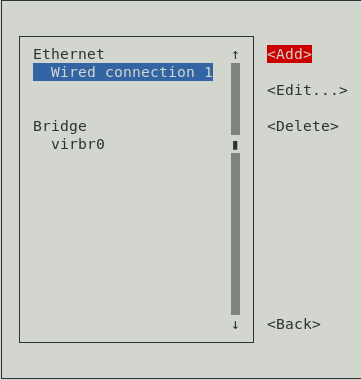
Then click the Add button to create new connection:
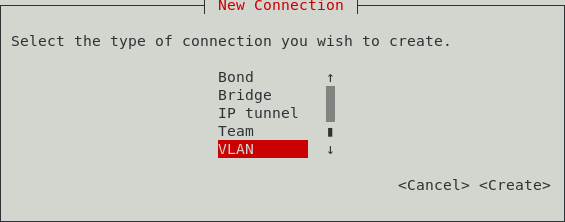
Select the VLAN connection:
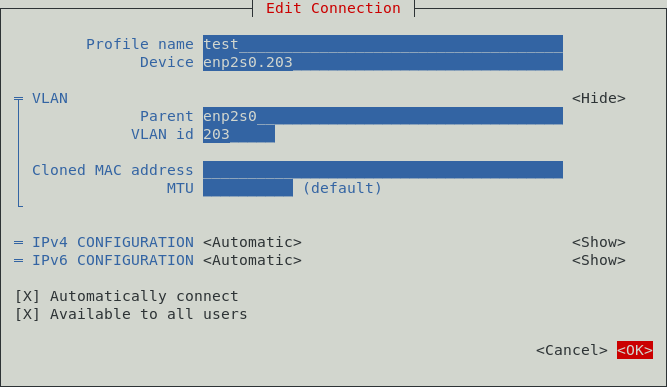
Set the required name of the system profile - “test”, then specify the VLAN interface that will be displayed in the system - “enp2s0.203”. The next step is to specify the parent interface “enp2s0” and add the VLAN id “203”:
Exit the NetworkManager:
This was the last step of the VLAN configuration.
Check the IP address received by the VLAN interface using the ip a command:

If the IP address was not obtained automatically, deactivate and then activate the VLAN interface through the “Activate connection” menu of the nmtui utility.
Ubuntu - Network Manager
Configuring VLAN interfaces in Ubuntu using the utility nm-connection-editor.
Network Manager is a tool for managing network connections under Linux. The nm-connection-editor is an graphical shell of this tool and is used to create and edit various types of connections.
To see the available interfaces in the system, enter the command ip a in the terminal.
The response will include a physical interface, e.g. “enp4s0” which will be used to create a VLAN connection:
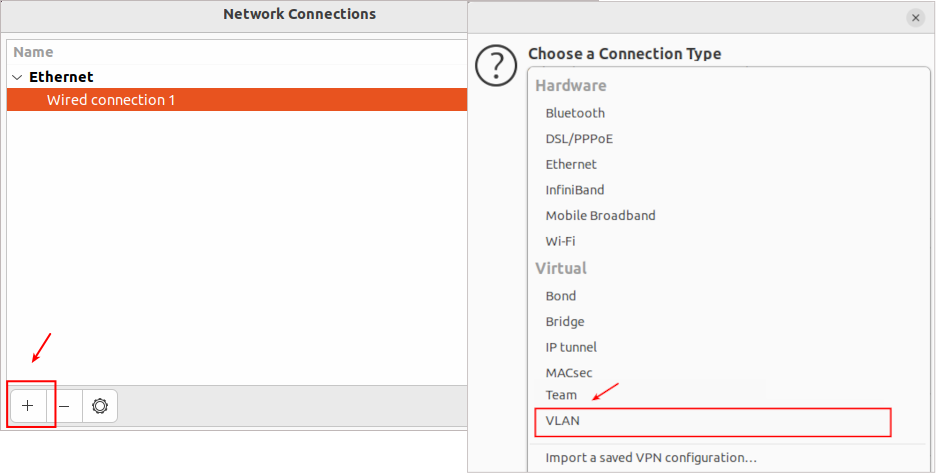
The next step is to create the VLAN connections. Type nm-connection-editor in a terminal window:

In the dialogue box that appears, click the Add button. Open the full list of possible connection types and select the required connection type - VLAN:
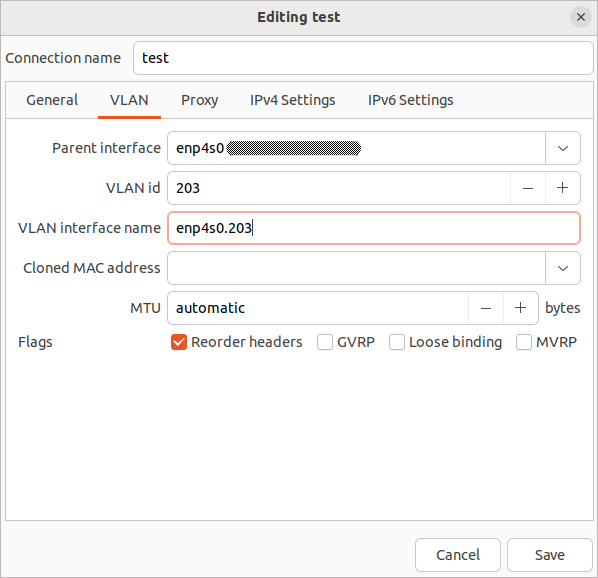
Give the name “test” to the new connection. Select the parent interface of our connection - “enp4s0”. Assign the ID of the new VLAN and give the name to the VLAN interface “enp4s0.203”:
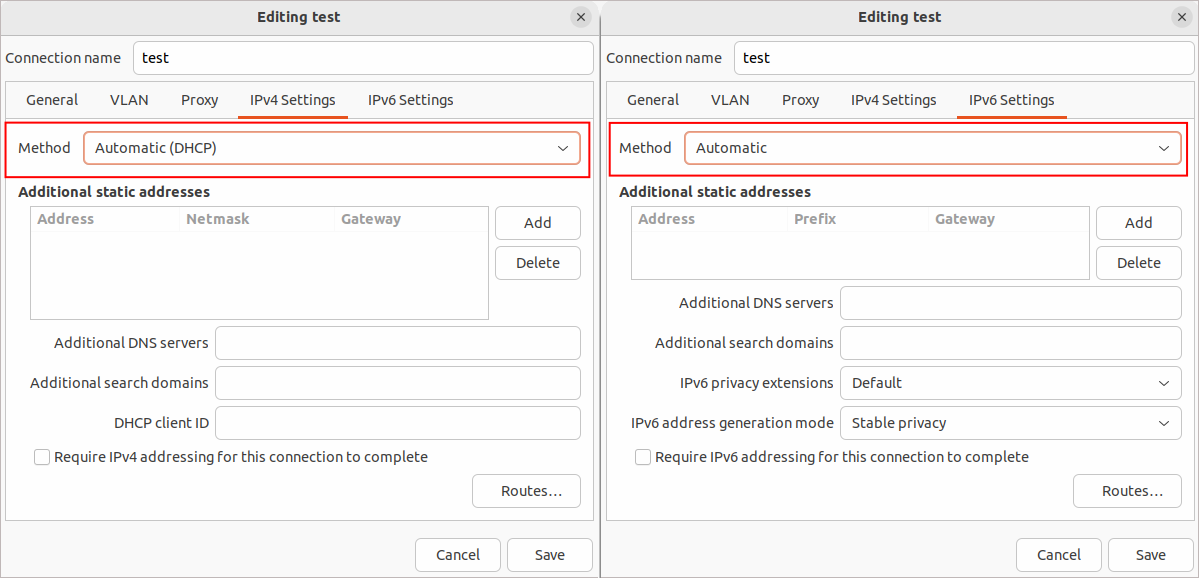
Check the receiving method for IPv4 and IPv6. In our case - DHCP
Save the configuration and check the presence of the created VLAN in the system:

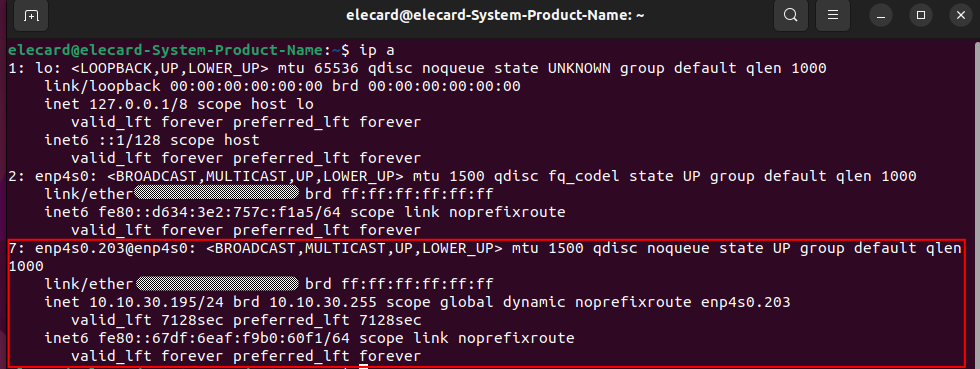
Check the IP address of the created VLAN connection in the console using the ip a command:
Windows support
Windows Desktop operating systems don’t fully support VLAN technology. However, some adapters have hardware support for virtualization. In such cases, vendors recommend the use of special utilities. Review your adapter driver vendor’s documentation.
The Windows Server OS has native VLAN support, more detailed information can be found in the article How to Configure Multiple VLANs on Windows Server 2022/2019/2016 (external source).